 DOWNLOAD & SAVE THIS POST >> CLICK HERE <<
Have you ever thought about selling a physical product?
TRY SHOPIFY…
If you’ve ever thought about selling physical products online, especially as a drop shipper, then you know it’s a fairly daunting task.
You need to set up a secure ecommerce website. You need to create an online catalog of products. You need to figure out a system for accepting payments, informing your suppliers, and keeping customers informed about each step of the order fulfillment and delivery process!
It’s enough to make anyone scrap the whole drop shipping idea and just go apply for a day job instead.
But don’t give up on that whole idea just yet, because there is a surprisingly simple way to do that.
And that surprisingly simple way is called Shopify.com.
Shopify is a third-party platform that you can use to set up an ecommerce storefront to sell physical products, including drop shipping offers. This is ecommerce made simple.
Here are the main benefits of using Shopify…
NO CODING
That’s right, no technical or design experience required.
If you tried to set up a secure ecommerce site on your own, you’d be spending a lot of time and/or money on design, coding, framework, and more.
You don’t have to do any of that to set up a Shopify store. Just set up an account, and within minutes you can be using Shopify’s templates and tools to build a robust, secure store. No big budget needed, no experience required, no design or coding skills. The templates and tools Shopify provides are literally point and click easy
SCALABILITY
Shopify is designed to grow with your business. Today you might start out with a small store with a trickle of traffic. Next year your business could be absolutely booming, with hundreds of products and thousands of customers. Shopify can handle your growing needs, no problem.
INTEGRATES
Shopify works for online and offline selling.
Often times when small business owners have an offline and online store, they need to run these locations almost as if they were two separate businesses. Doing inventory and accounting can be an absolute nightmare.
One big advantage of the Shopify platform is that you can integrate it easily with your offline activities. So when you sell a product via Shopify, you can use Shopifys apps and tools to instantly update your inventory. That’s much easier than manually typing in entries and causing problems because your inventory numbers are off.
EASY
Shopify is a great choice for small to medium business owners
As mentioned above, Shopify is really attractive to sellers because you don’t need a big budget or any technical experience to get going. This makes it ideal for small to medium business owners, drop shippers, those who want to start selling for the first time, and those who’re already selling but want to expand.
Even technically skilled and experienced business owners use Shopify. That’s because the platform is known to be user-friendly and secure, something which costs a lot of time and money if you had to develop it on your own. Using Shopify frees up these resources, so that you can focus on getting sales, while letting the platform owners take care of the security on the back end.
CHOICES
You can choose from a variety of plans.
There is no “one size fits all” plan when it comes to Shopify. You can choose the pricing and features plan that best fits your needs and budget today, and then you can upgrade as your store grows and your needs change.
You can get started with a free trial for three weeks, and then upgrade for as little as $29 per month (plus credit card fees) for the “Basic Shopify” plan. When your business grows, or if you’re just looking for more features (such as the ability to accept gift cards), then you can upgrade to the Shopify or Advanced Shopify plans.
 SOUNDS GOOD, YES?
As you can see, there are a lot of really good reasons to set up a Shopify store.
So just how easy is it?
Come along as we walk you through the process – I think you’re going to be surprised! Read On…
SETTING UP YOUR FIRST STORE
One of the benefits of using Shopify is that it’s very, very easy to set up a store. So let’s walk through the steps:
STEP 1: GET A FREE TRIAL
Discover the BEST Way to Get Started With Your First Shopify Store – Just optin below and then we can deliver the best way to get our private 21 day free trial then 10% off link. If you are now ready to get started, then you can use our special link to get started right away (21 day free trial)… We will email you the details.
![]()
Get Started With shopify free!
You don’t even need a credit card to get started.
Best of all, if you like what you see during the trial and you decide to sign up for the regular plan, you’ll get 10% off that plan for life. So if you want to get a good deal, then use the link above rather than going to the site.
STEP 2: CREATE YOUR ACCOUNT
Let’s walk through these quick and easy steps:
2.1) The Process
First, Shopify will ask you to fill in a few forms to get started. You’ll need to enter your email address, your password, and the name of your store. Simple, right?
TIP: The link for you store will be store-name.shopify.com. So you need to pick something short, snazzy, memorable and overall brandable. Later on we’ll talk about setting up a domain that redirects to your store.
2.2) Next, you’ll need to fill in your mailing address to set up currencies and tax rates. Easy peasy so far.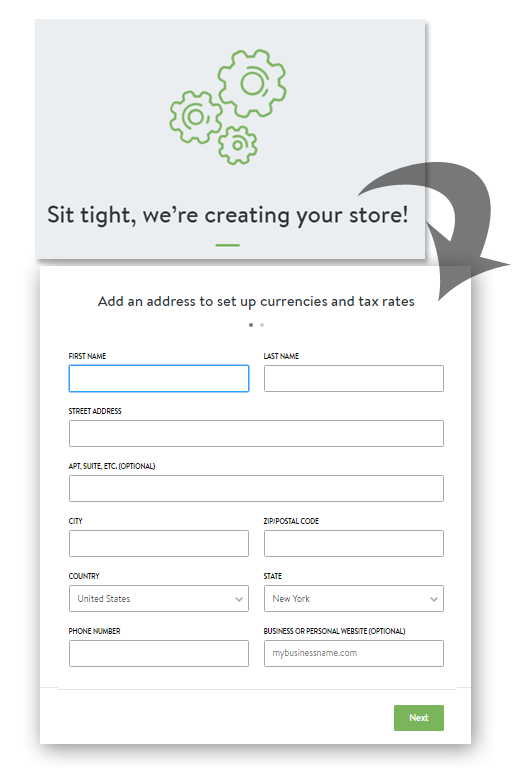
2.3) Then you’ll need to answer a couple quick questions about whether you’re already selling products, what sort of revenue you’re looking at, and if you’re setting up the store for someone else.
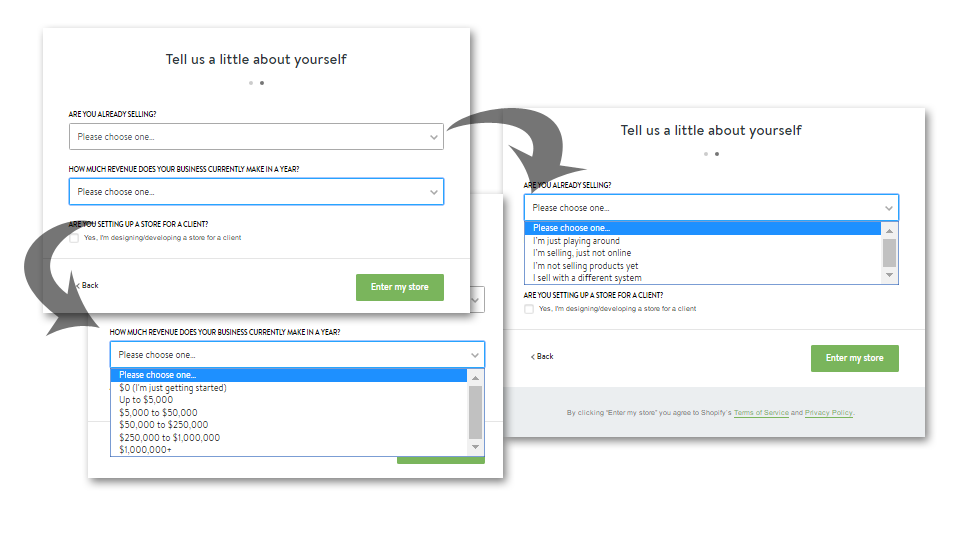
Answer those questions, click “Enter My Store,” and you’re done with the initial account set-up. (See, I told you it was easy!)
STEP 3: SET UP YOUR STORE
Once you’ve set up your account, then Shopify will walk you through the process of setting your store.
There are three main tasks associated with this step:
- Customize the look of your store.
- Start adding products.
- Add a custom domain, which is optional.

Let’s go through these steps…
3.1) Customize The Look Of Your Store
The beauty of using Shopify is that you don’t need to be a design or technical wizard in order to create a really professional, beautiful storefront. That’s because Shopify has plenty of both free and premium themes for you to use.
You can see them all – Just click here
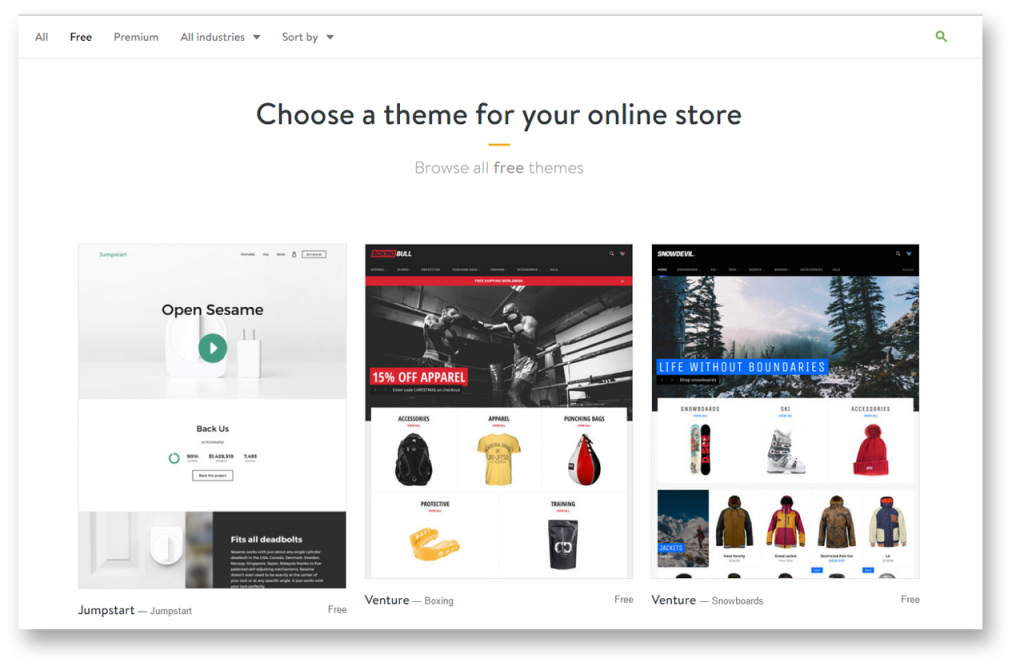
These themes are all mobile-friendly and customizable.
Now sometimes platforms like this offer really sub-par free themes in hopes that you’ll upgrade to the premium (paid) themes. Not so with Shopify. As you’ll quickly discover, even their free themes look great – they’ll make a great impression on your visitors, and you’ll be proud to present this professional image.
However, if you’re looking for something a little more unique, then you might take a look at their premium themes.
Either way, installing a theme is easy. Simply click on the theme of your choice, and at the next step you click the green “Install Theme” button. You then have the option of using it immediately as your store’s theme, or you can install the theme but not publish it.
Once you’re setting up your store, go ahead and select the green “Publish as my shop’s theme” button. A quick progress bar later, and your theme will complete its download and installation.
Click on the green button that says “Go To Your Theme Manager.” This is where you can edit your theme if you so choose. Your theme is ready to go out of the box, but of course you can change fonts, colors, the header, the footer, navigation, and other features.
You’ll be able to change each of these things on the various pages of your theme, including the home page, catalog (product) pages, blog and the “about us” section. You’ll also be able to quickly check how your theme looks on a desktop, tablet, or mobile device.
Easily, you can do many of the basic customizations (such as inserting your logo or changing fonts) using the built-in editor that basically lets you click your way to a beautiful store front. But if you’re looking to do advanced customizations, no problem – you can edit your theme’s HTML and CSS files directly.
We won’t get into the exact specifics of how to edit your theme, since it’s going to differ according to the theme you chose. If you need help, all themes come with documentation, and there is support available to give you a hand.
Next up…
3.2) Start Adding Products
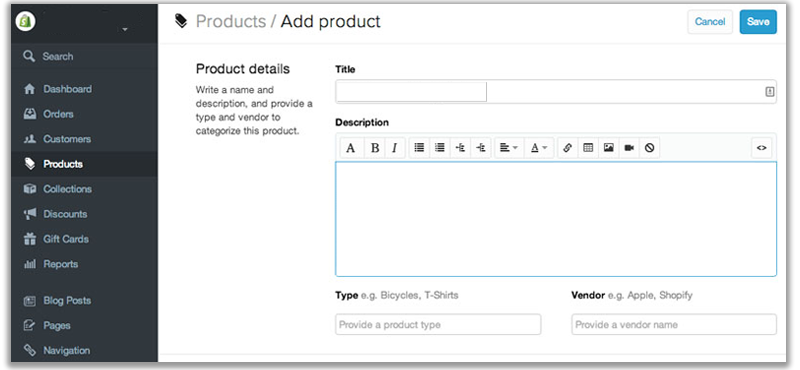
Now it’s time to start building out your actual store, so click on the “Add Product” option in your dashboard to get started.
As with all things on Shopify, this process is very simple and very straightforward. Once you get into the product section, you just follow the prompts to fill in the information about your product. This includes:
- Product title.
- Your product description.
- A good quality product image.
- Inventory information (e.g., SKU and barcode).
- Shipping information (such as weight)
- Whether you’d like to add this product to a collection or category so that similar products are grouped together in your store.
While it is a simple process to add products, it does take time to manually enter in all the information and get your store set up. Fortunately, there are apps available that automate the process to make it easier than ever. You’ll learn more about these apps in just a little bit. But first, let’s talk about where to get products to sell…

DROP SHIPPING MADE SIMPLE
Now a lot of people use Shopify for drop shipping. That’s because you don’t need to carry the inventory yourself, and you don’t need to worry about shipping and fulfillment. All you have do is set up your Shopify store with products from a drop shipping supplier, and then inform your supplier whenever you take an order for a product. You get the products at wholesale prices, and then mark them up to whatever you want to sell them for.
If you haven’t yet decided exactly what to sell, or you’re just not sure where to source your products, then check out AliExpress.com. You don’t need to buy anything, you don’t need to pay any upfront fees. You can get started immediately for free.
You’ll see that they sell everything from home improvement items to electronic gadgets to health and beauty products—and everything in between. All you have to do is take orders via your Shopify store, and AliExpress will take care of everything else.
Let me share with you a few tips for choosing products from the AliExpress marketplace…
Look for ePacket Products
One of the reasons that you can get products through AliExpress for such a good price is because many of them are coming from China and Hong Kong. However, this also means you need to charge for shipping – and some customers are going to balk at the price.
The solution?
Look for AliExpress products that include “ePacket delivery,” which means the products are shipped for free. While it does take time for the products to arrive (such as two weeks), your customers won’t have to pay exorbitant shipping fees.
Select Popular Products
The idea here is to select in-demand products from reliable suppliers. So to that end, check your products for the following characteristics:
- Plenty of sales. You want products with at least a few hundred orders, as that tells you it’s an in-demand product that your customers are likely to buy too.
- Good ratings. Ideally, looking for products with ratings of at least 4 stars. You want good product ratings and good vendor ratings.
Next…
Check Out The Pictures
Your product pictures are often the first thing that catch a prospect’s attention, so be sure the vendor’s pics are high-quality photos that really showcase the product in a positive way.
Look for High Profit Margins
If you choose products with low margins, then you’ll probably find that you’re not making much more than minimum wage (if you’re lucky!) when you work on your store. That’s why you’ll want to seek out in-demand products with high profit margins.
If you put these tips to work for you, then you should be able to find in-demand products with good profit potential to add to your store.
And now the next step…
3.3) Add a Custom Domain (Optional)
This part is optional. When you create your Shopify store, you’ll get a link to a store front in this format: your-store.shopify.com.
That works… but it may be hard for your customers to remember your store name. And branding is harder when you don’t have your own domain.
And the Solution is…
Go to a reliable domain registrar to get a custom domain to use for your store. Then go to your dashboard to set this up (click on “Add Domain” under the “Set Up a Custom Domain” menu.
FRESH INSIGHT…
Here’s more information about how to set this up: Click Here.
INSIDER TIP: Shopify gives you the option of purchasing a domain through them, and they’ll even set it up. However, it’s a good idea for diversification purposes to use a separate domain registrar to register your own domain. That way, if anything happens to Shopify in the future, or if you lose your Shopify account, then you won’t lose both your store front and your domain. If you are now ready to get started, then you can use our special link to get started right away (21 day free trial)… We will email you the details.
Click Below to Discover the BEST Way to Get Started With Your First Shopify Store…
![]()
Get Started With shopify free!
Now the next step…
STEP 4: CHECK YOUR SETTINGS
Head back to your Shopify dashboard and click on the “Settings” icon in the main menu. This is where you’ll install the finishing touches on your store so that you can start taking orders. (Are you getting excited yet? You’re almost done!)
Here are the main settings you need to take care of…
 PAYMENTS
At this point you have a pretty darn awesome storefront with in-demand products. But how will you get paid when people place an order?
You actually have multiple options. You can accept payments directly through Shopify. You can accept payments through PayPal. You can enable a payment gateway if you have your own merchant account, or you can even set up a custom solution (such as COD payments).
 CHECKOUT
In this section you can decide what types of information to collect from customers, how and whether you’ll add them to a mailing list, the language displayed on your order form, and your store policies such as refund policy.
 SHIPPING
Here’s where you set up the shipping options. You’ll choose your shipping rates, how to print a label, and insert information about what types of packages you’ll be sending.
This section is also important if you’re drop shipping through AliExpress or any other fulfillment company. At the end of the section you’ll find a place where you can manage your drop shipping options – just click on the “Add Drop Shipping Service” to get started.
 TAXES
TAXES
As you probably guessed, this is where you enter information about any taxes you need to collect, such as VAT. You can enter your tax rates for specific countries so that Shopify automatically collects the tax at checkout.
 NOTIFICATIONS
This is a great way to automate your store, because this is where you set up email templates that are sent either to you or your customer. For example, you can be notified when someone abandons their shopping cart. Or you can send out automated emails to customers to keep them in the loop about their order fulfillment.
Once you’ve gone through these settings, then move onto the next step…
STEP 5: INSTALL APPS
One of the beautiful things about using Shopify is that you start with this framework that’s pretty powerful all on its own, but then you have the option to install apps for added functionality.
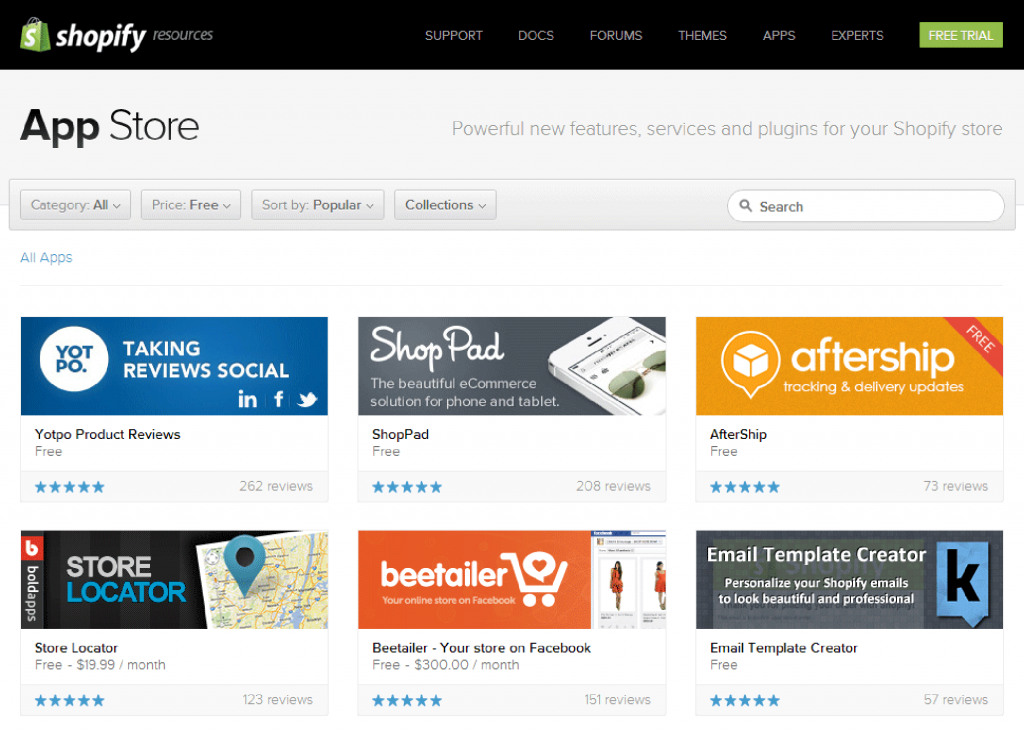
You can see the full line of apps here
If you’d like to automate your store or add a specific function to it, there’s probably an app for that. The app categories include marketing, sales, social media, shipping, payments and more.
For example:
- Need to keep your customers in the loop about shipping times? There’s an order-tracking app for that.
- Would you like your Shopify store to integrate with your backend inventory system? There are inventory apps for that.
- Do you use accounting software such as Quickbooks to track your business activities? You can install an app to integrate your store with your accounting software.
- Would you like to deliver better customer service to your prospects and customers, such as by offering live chat? Yep, there’s an app for that too.
And those are just a few examples. Browse through the app store, and you’ll find plenty of apps to power and streamline your store.
REMEMBER…
Get Started With shopify free!
If you are now ready to get started, then you can use our special link to get started right away (21 day free trial)… We will email you the details.
SO THE CONCLUSION IS…
So there you have it: a surprisingly easy way to set up your own drop shipping storefront.
You don’t need any technical knowledge. You don’t need a big budget. You don’t even need to invest a lot of time, especially if you know the secrets of setting up your store faster and easier than ever with the best automation tools available.
[su_note note_color=”#169016″ text_color=”#feffff”]Would you like to learn these secrets?
Then you’ll want to check out this free webinar replay: Click Here For Free Webinar
This webinar shows you how to build a store from scratch faster than you ever thought possible, flood it with targeted visitors and accelerate growth to scale your business. This replay is only available for a limited time, so check it out right now.
[su_button url=”https://promotelabs.com/blog/shopified-app-review-bonus/” style=”flat” background=”#ffffff” color=”#14750f” size=”7″ center=”yes”]Click Here To Learn the Secrets [/su_button][/su_note]
DOWNLOAD & SAVE THIS POST >> CLICK HERE <<


